Docker Build Args: A Brief Introduction

Carlos Schults


When it comes to building docker images, consistency and reproducibility are key. Put a dockerfile inside your project and you bet everyone is going to build your image the same way—with the exception of differences in the code itself. Still, on occasion you want more flexibility in the process, and that's where docker build args come in handy.
In this post, you'll learn the what, why, and how of passing arguments to docker builds. We'll walk you through docker build args and explain what they are and how to use them in practice.
Prerequisites#
The prerequisites for following along with this post are minimal. We assume that docker is installed on your machine and you have basic familiarity with it. Also, we assume the same for git: you have it installed, you're comfortable with it. The git requirement exists because you'll be asked to clone a GitHub repo later on.
If you're good, then let's dig in.
What Are Docker Build Args? Why Do You Need Them?#
"Docker build args" are nothing more than arguments you pass to the docker build command. They serve as a way to change the outcome of a docker build without having to change the dockerfile itself. Why is that needed?
If you think about it, building a docker image is a rigid process: if you have a dockerfile and you execute it a hundred times, you're going to end up with a hundred identical images, differences in the context notwithstanding. Sometimes you'd want this process to be a bit more flexible, so you can, for instance, change runtime versions of some of the application's dependencies without having to change the dockerfile.
You can achieve that by passing an argument to the docker build command process and have the dockerfile declare a default value for fallback.

Docker Build Args, First Example#
Using docker build args is quite easy and consists of basically two steps:
- Define the argument in the dockerfile
- When building the image, pass the argument using the --build-arg flag
Let's start with the simplest example possible. Start by creating a folder and then a file inside the folder with the name of Dockerfile. Then, paste the following text in the file and save it:
ARG arg1
FROM alpine:latest
RUN echo "Argument: $arg1"
The file above is quite simple:
- In the first line, we declare our argument, called arg1
- Then, we declare we're using the Alpine Linux image as the base
- Finally, we run a plain echo command, displaying the value of the argument
OK, now it's time to build the image. Using your terminal, run the following command, ensuring you're in the same folder as the dockerfile:
docker build --build-arg arg1="This is some test value" -t demo-args-image:v1 .
Pay attention! Notice that the command above ends with a period (.), which represents the build context. If you omit that period, the command won't work as expected.
So, when you build the image, you'll see the following line being logged:
[2/2] RUN echo "Argument: This is some test value"
That means the argument passing was successful and you were able to influence the build process in a way.
Docker Build Args, A Better Example#
The previous example was arguably not the most useful one. Now let's see how you could use build arguments for a real use case, using a more involved example.
Get the Sample Application#
For this example, we'll use a sample .NET app, but don't worry if you're not familiar with C#/.NET: we won't really change the application's code. So, start by cloning the repo on GitHub.
After you're done, use your favorite editor and open the project folder. Look for the dockerfile and open it. You'll see the following content:
ARG DOTNET_VERSION=8.0
FROM mcr.microsoft.com/dotnet/sdk:${DOTNET_VERSION} AS build
ARG ENVIRONMENT=Development
WORKDIR /app
COPY . .
RUN dotnet restore
COPY appsettings.${ENVIRONMENT}.json appsettings.json
RUN dotnet build -c Release -o /app/build
RUN dotnet publish -c Release -o /app/publish
FROM mcr.microsoft.com/dotnet/aspnet:${DOTNET_VERSION} AS runtime
ARG ENVIRONMENT=Development
ENV ASPNETCORE_ENVIRONMENT $ENVIRONMENT
WORKDIR /app
COPY --from=build /app/publish .
ENTRYPOINT ["dotnet", "build-args-mvc.dll", "--environment=${ENVIRONMENT}"]
As you can see, there are two arguments: DOTNET_VERSION and ENVIRONMENT. They are used to define the version for the .NET SDK and runtime that will be used to build and run our application code, and also to define the environment. The two variables have fallback values in case they're not provided during the build process.
Building the Images#
OK, now let's do something interesting: let's build not one, but two docker images. Run both commands below, one after the other:
docker build --build-arg ENVIRONMENT=Production -t mydemoimage:prod .
docker build --build-arg ENVIRONMENT=Development -t mydemoimage:dev .
So, if you've run the commands above, that means you now have two images, one for each environment. For the second command, it wasn't even needed to pass the argument, since "Development" is the default value, but I chose to do it anyway, just for completion's sake.
The next step is now to spin up two containers, one from each image:
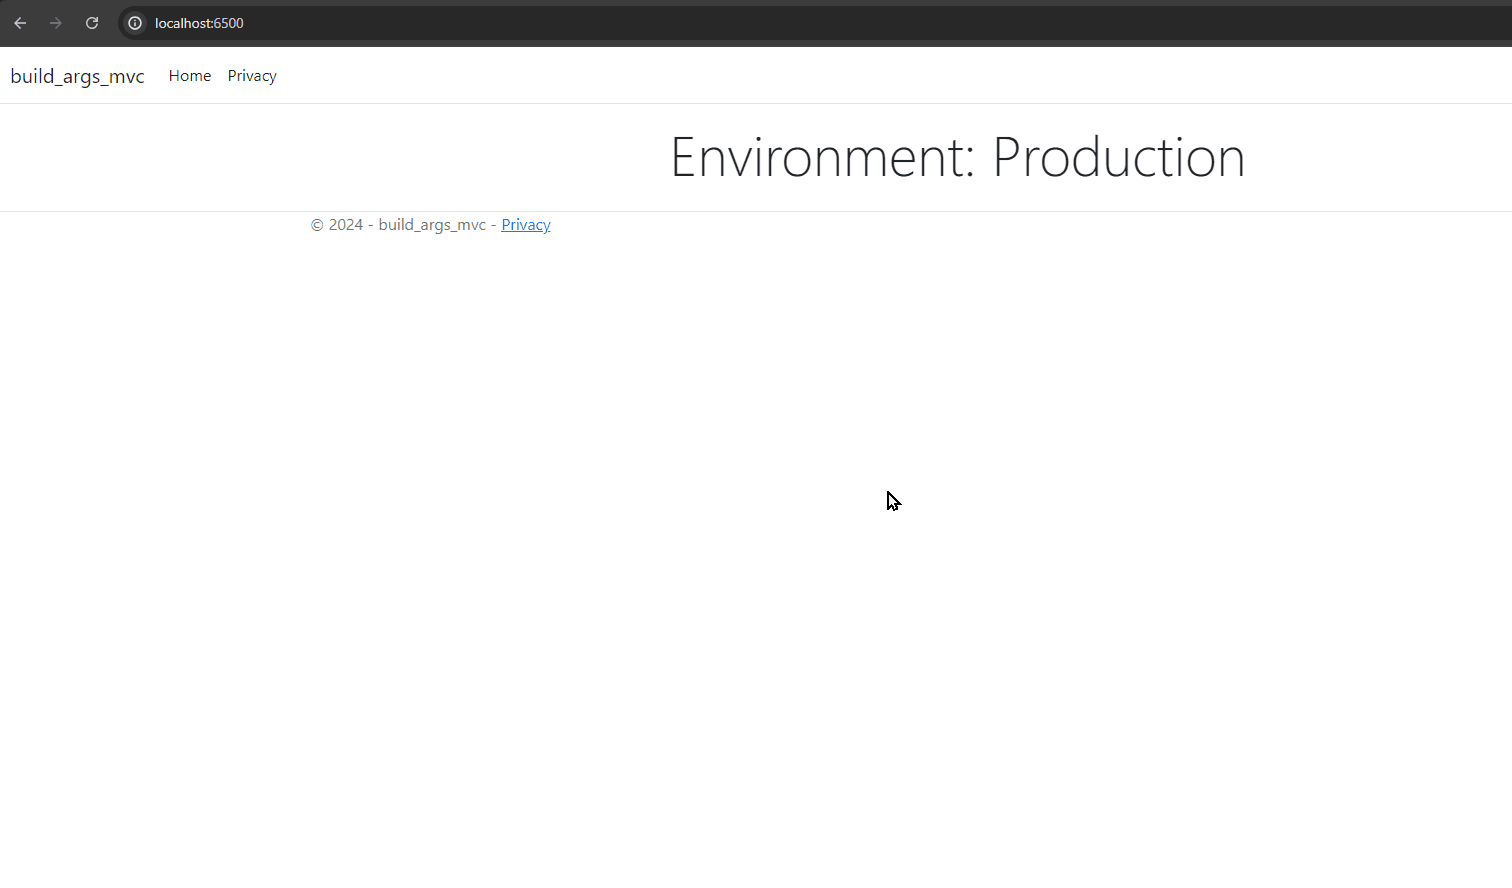
docker run -d --rm -p 6500:8080 mydemoimage:prod
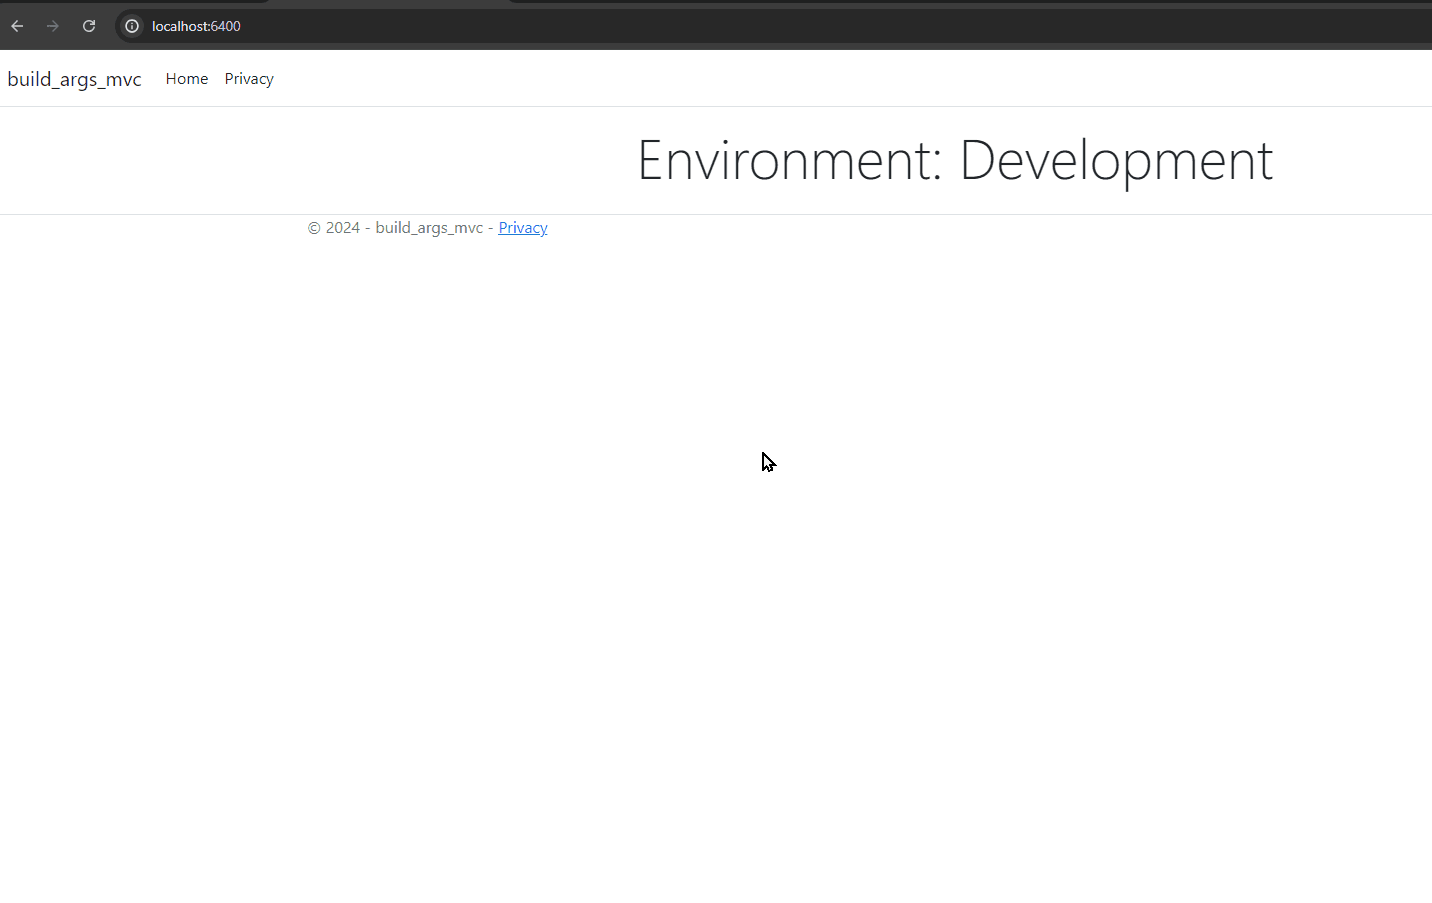
docker run -d --rm -p 6400:8080 mydemoimage:dev
Now, point your browser at localhost:6500, and you'll see that it displays "Environment: Production":
If you access localhost:6400, the variable name will be "Development":
Why does this happen? If you look closely at the dockerfile, starting on line 15, you'll see this:
FROM mcr.microsoft.com/dotnet/aspnet:${DOTNET_VERSION} AS runtime
ARG ENVIRONMENT=Development
ENV ASPNETCORE_ENVIRONMENT $ENVIRONMENT
Here we define again the "Environment" argument, because they are reset after each "FROM" directive, then assign that value to the ASPNETCORE_ENVIRONMENT environment variable. That one is passed to the application when we run it:
ENTRYPOINT ["dotnet", "build-args-mvc.dll", "--environment=${ENVIRONMENT}"]
Within the main controller from our application, we have the following piece of code:
public IActionResult Index()
{
var environment = Environment.GetEnvironmentVariable("ASPNETCORE_ENVIRONMENT");
ViewBag.EnvironmentName = environment;
return View();
}
Here we retrieve the value of the environment, which was set when we ran the application, and assign to a ViewBag property—a form of lightweight data transfer between a controller and a view.
Finally, in the View file, we display that value:
@{
ViewData["Title"] = "Home Page";
}
<div class="text-center">
<h1 class="display-4">Environment: @ViewBag.EnvironmentName</h1>
</div>
Docker Build Args Versus Environment Variables#
As you've seen, in the previous example we used, besides arguments, an environment variable. What's exactly the difference between the two?
The simplest way to explain the difference is this: environment variables are available for running containers, while args are not. In other words, environment variables are meant for containers, while build args are meant for the build process.
Conclusion#
In the software development realm, we're always looking for ways to ensure consistency and reproducibility, and Docker is a terrific tool for that. Distribute the same Docker image and you're sure that everyone will be able to run your software the way you intended. Put a dockerfile inside your project and rejoice as every image of your app is built consistently—code changes notwithstanding.
However, you do want to introduce some flexibility, and that's where docker build args shine. In this post, you've learned what build arguments are in docker and how easy it is to get started with them.
If you are looking to make your image-building process quicker and more efficient, DevZero might be the solution you want. The always-on up-to-date cloud development environment can be used as an external environment to build docker images, even allowing the exchange of image caches to even further reduce build times.
Give DevZero a try today. Thanks for reading!
This post was written by Carlos Schults. Carlos is a skilled software engineer and an accomplished technical writer for various clients. His passion is to get to the bottom (the original source) of things and captivate readers with approachable and informative technical content.

Carlos Schults


